Let’s be honest, moving is expensive, and getting your full security deposit back is a top priority. Too often, renters feel like that money is out of their hands, subject to a landlord’s interpretation of “normal wear and tear.” A detailed move-out checklist is the single best tool you have to protect that deposit. It serves as your personal guide to leaving the property in excellent condition, addressing everything from deep cleaning the kitchen to patching small nail holes. By methodically documenting your work, you create undeniable proof of your diligence, leaving no room for vague claims or unfair deductions from your hard-earned money.
Moving is a whirlwind of packing boxes, coordinating schedules, and saying goodbyes. It’s easy to feel overwhelmed, and even easier for important details to slip through the cracks. This is where a move-out checklist becomes your most valuable tool. Think of it as your game plan for a smooth, successful move that leaves nothing to chance. It’s more than just a to-do list; it’s a systematic guide that ensures you meet all your lease obligations, protect your finances, and leave on good terms with your landlord.
Following a checklist helps make the moving process smoother for both you and your landlord. It transforms a chaotic experience into a series of manageable steps, giving you a clear path from start to finish. By methodically ticking off each item, you can confidently handle every task, from deep cleaning the oven to forwarding your mail. This simple document empowers you to take control of your move, reduce stress, and end your tenancy on a positive and professional note. It's the difference between a frantic, last-minute scramble and a calm, organized departure.
Let’s be honest, the number one reason to use a move-out checklist is to get your full security deposit back. This list outlines exactly what you need to do to leave the property in great shape, meeting the requirements of your lease agreement. Its main goal is to help you know what tasks to complete so you can reclaim your deposit without any surprises. By following a detailed plan, you can systematically clean, repair, and document the condition of your rental, leaving no room for your landlord to make unnecessary deductions. It’s your roadmap to a full refund.
A move-out checklist is a powerful tool for clear communication and can help prevent arguments with your landlord over the security deposit. When you have a documented record of the property's condition upon moving in (your move-in checklist) and moving out, it’s much easier to have a productive conversation. This documentation helps clearly show the difference between normal wear and tear, which is expected, and actual damage, which you may be responsible for. It replaces subjective opinions with objective facts, ensuring a fair and transparent process for everyone involved.
The final weeks of a lease can be hectic. A good moving-out checklist helps you stay organized and avoid problems during your move. Instead of trying to remember every little thing, you have a single source of truth guiding your actions. This structure is incredibly calming during a stressful time. It breaks the monumental task of moving into small, achievable steps, from cleaning the baseboards to returning your keys. This keeps you focused and on schedule, preventing last-minute panic and ensuring you don’t forget any crucial responsibilities before you hand over the keys for good.
A great move-out checklist is your roadmap to a stress-free transition and a full security deposit refund. It breaks down the overwhelming job of moving into manageable tasks. Think of it as your personal project plan for leaving your old place in great shape and starting fresh in your new one. Your list should cover four key areas: a thorough deep clean, necessary repairs, clearing out all your belongings, and handling the administrative details like utilities and mail. By tackling each of these categories, you’ll leave no stone unturned and make a positive final impression on your landlord.

Let’s be honest, deep cleaning is probably the last thing you want to do, but it’s one of the most important. A spotless apartment is your best strategy for getting your security deposit back in full and avoiding extra cleaning fees. You’ll want to clean every room from top to bottom, paying special attention to the spots you might normally overlook. This means scrubbing appliances inside and out, wiping down baseboards, cleaning windows, and getting into every corner of your cabinets and closets. Think of it as returning the space to the condition you found it in. A little elbow grease now can save you a lot of money and hassle later.
Before you hand over the keys, take a walk through your apartment to spot any minor damage that occurred during your stay. Patching small nail holes, fixing a leaky faucet, or replacing a burnt-out lightbulb are small fixes that make a big difference. Your lease agreement should outline your responsibilities, but generally, tenants are expected to handle minor upkeep. If you skip these tasks, your landlord can legally use a portion of your security deposit to cover the cost of hiring someone to do them. Taking care of these small repairs yourself shows you’ve been a responsible tenant and respected the property.
This step is about more than just packing boxes. You need to remove every single personal item from the property, and that includes any trash or unwanted belongings inside and outside. Don’t leave anything behind in closets, cabinets, the garage, or on the patio. This is also the perfect opportunity to declutter before you move. Go through your things and decide what to keep, donate, or toss. Packing and moving items you no longer need is a waste of time and energy. A thorough clear-out makes the final cleaning easier and ensures the new tenants have a completely fresh space to move into.
Handling the administrative side of moving is crucial for a smooth transition. About a month before your move-out date, schedule the transfer or cancellation of your utilities, including electricity, gas, water, and internet. You don’t want to pay for services you’re not using. At the same time, you’ll need to officially change your address with the post office to ensure your mail follows you. Remember to also update your address with your bank, credit card companies, subscription services, and any government agencies for your driver’s license or voter registration. Getting this done early prevents future headaches and ensures you don’t miss any important mail.
Moving can feel like a massive project, but breaking it down into a timeline makes it manageable. A good plan prevents that last-minute panic and helps you leave your old place on great terms. Think of the next two months as a series of small, achievable goals. By spreading out the tasks, you’ll have plenty of time to handle everything from packing boxes to forwarding your mail without breaking a sweat. Let’s map out your move from eight weeks out all the way to moving day.
Planning ahead is your best friend for a stress-free move. Start your preparations about eight weeks before your moving date to give yourself plenty of breathing room. Your first big step is to review your lease and give your landlord written notice. Most leases require a 30-day notice, but it’s always smart to double-check your agreement. Once that’s done, you can start thinking about logistics. Around the four-to-six-week mark, schedule your utility transfers or disconnections. Getting this on the calendar early ensures you won’t be left in the dark (literally) at your new place or paying for services you’re no longer using.
With the big dates handled, it’s time to focus on your stuff. Moving is the perfect opportunity to declutter. Go through your belongings and decide what to keep, donate, or toss. Getting rid of items you no longer need not only simplifies packing but can also lower your moving costs. As you sort, consider creating a home inventory. This list helps you keep track of everything you own, which is incredibly useful for packing and for any potential insurance claims. You can start packing non-essentials, like out-of-season clothes or books, about four to six weeks before you move.
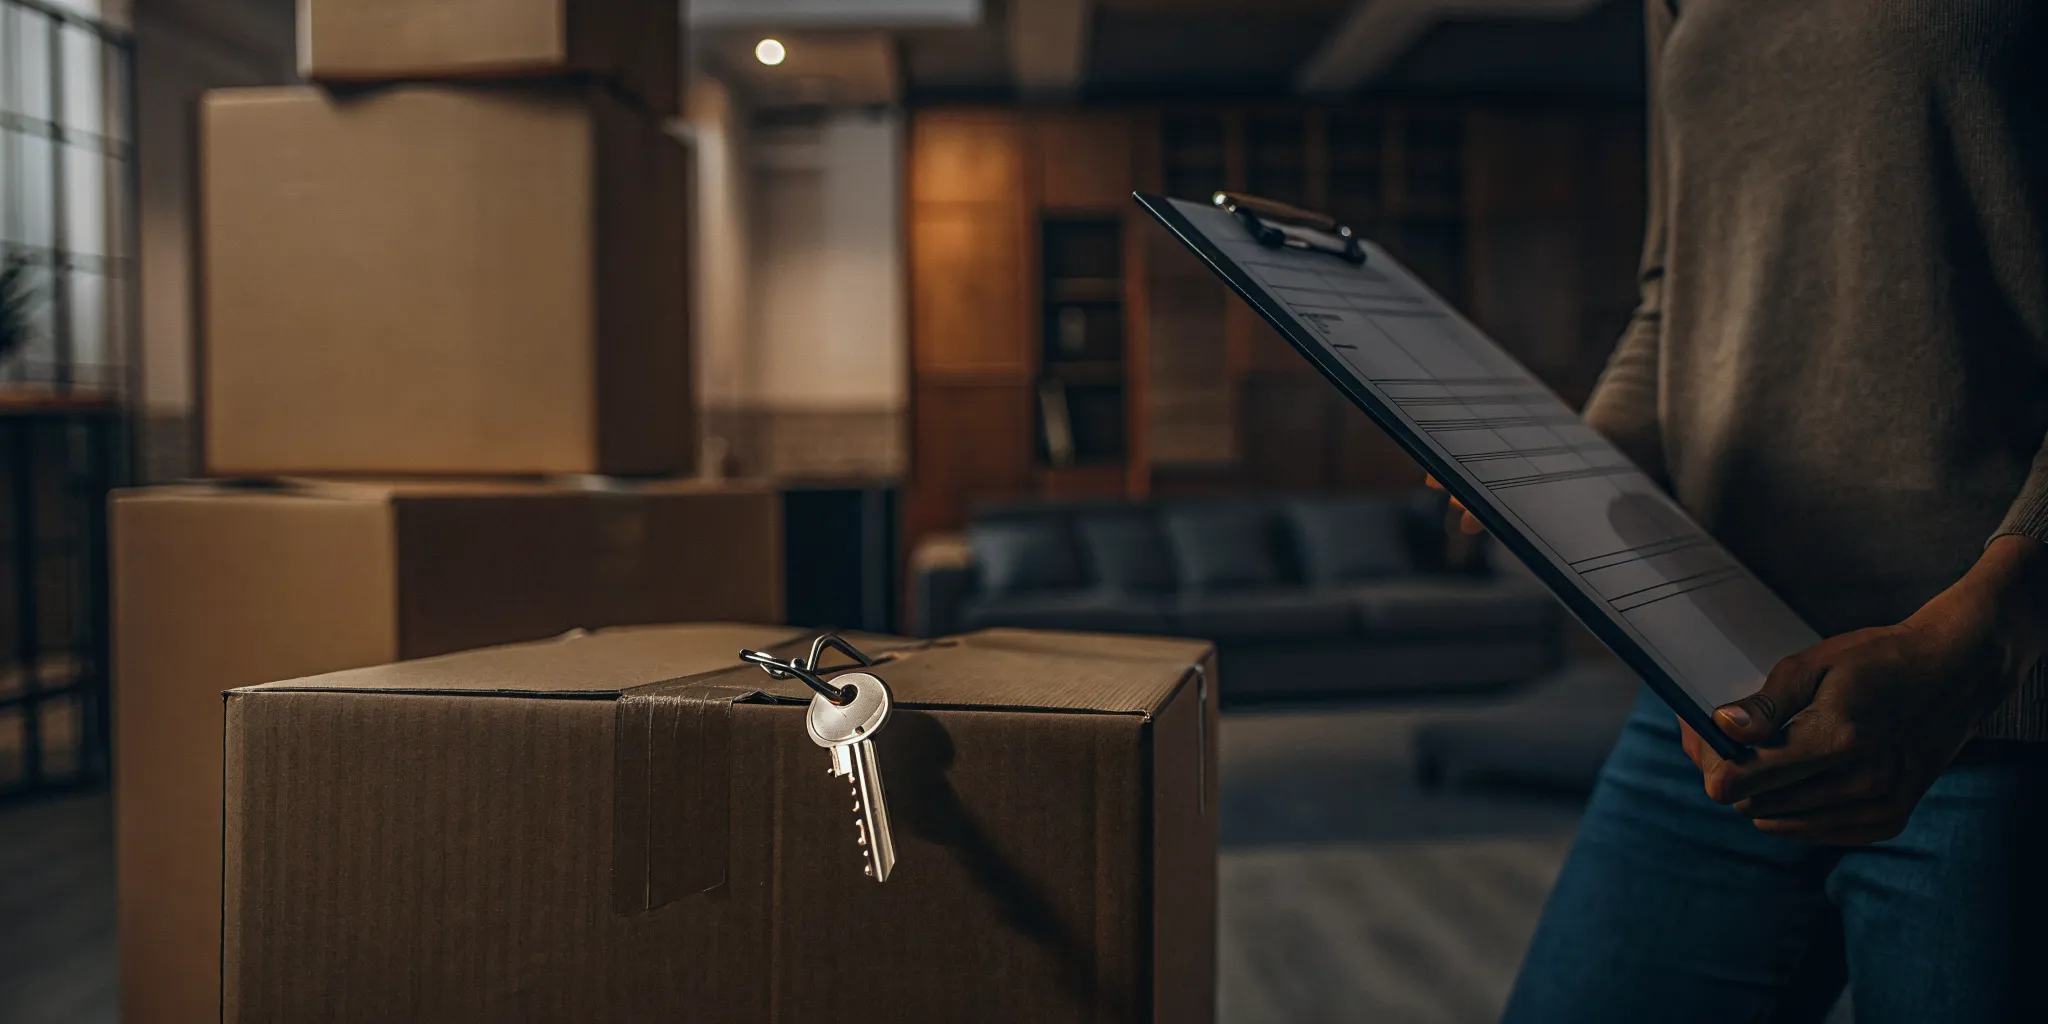
As you get closer to moving day, setting firm deadlines will keep everything on track. A few days before the move, call to confirm your arrangements with your moving company to avoid any last-minute surprises. Once the truck is packed and your apartment is empty, do one last walkthrough. Check every closet, drawer, and cabinet to make sure you haven’t left anything behind. Your final task is to return all keys, access cards, and garage remotes to your landlord. Be sure to get a receipt or some form of written confirmation that you’ve returned them to officially close out your tenancy.
Tackling a deep clean of your entire rental can feel overwhelming, so the best approach is to break it down room by room. Before you start, pull out your lease agreement one more time. Some landlords include specific cleaning requirements or a checklist of their own, and you’ll want to make sure you cover all your bases. Once you know what’s expected, you can grab your supplies and get to work on one area at a time. This method keeps you focused and makes the whole process feel much more manageable.
The kitchen often requires the most elbow grease, so it’s a great place to start. Begin with the appliances, cleaning the inside and outside of the fridge, oven, microwave, and dishwasher. Next, wipe down all cabinets and countertops, making sure to get any lingering grease or food splatters. Scrub the sink and faucet until they shine. Don’t forget to pull appliances away from the wall to clean behind them, and clear everything out from under the sink to wipe that area down, too. Finish by sweeping and mopping the floors.
Next up is the bathroom, where you’ll want to focus on getting rid of soap scum and disinfecting surfaces. Scrub the tub, shower, and sink thoroughly to remove any buildup. Give the toilet a good cleaning inside and out, and don’t forget the area behind it. Clean mirrors and light fixtures, then wipe down all faucets and handles. Pay attention to the little details, like cleaning out the exhaust fan to remove dust. Once all the surfaces are sparkling, you can finish by cleaning the baseboards and mopping the floor.
For bedrooms and living areas, the process is pretty straightforward. Start from the top down by dusting ceiling fans and light fixtures first. Then, wipe down all surfaces, including shelves, window sills, and baseboards. Make sure to clean the windows and their frames. Empty all closets and wipe down the shelves and rods inside. It’s also a good idea to disinfect high-touch spots like light switches and doorknobs. Finally, vacuum or mop the floors, moving any remaining furniture to clean underneath.
Before you officially finish your move-out clean, do one last walkthrough to catch any areas you might have missed. These are the spots that are easy to overlook but that your landlord will definitely notice. Pay special attention to entryways and hallways, wiping down walls and baseboards. If you have a garage or storage unit, sweep it out completely. Don’t forget about any outdoor spaces, like a patio or balcony, that need to be swept and cleared of any belongings. A final check ensures you leave the entire property looking its best.
Dealing with wear and tear is a normal part of living somewhere, but leaving behind actual damage can be a quick way to lose your security deposit. Before you move, walk through your apartment and make a list of anything that needs fixing. This includes everything from scuffed paint and nail holes to a dripping faucet or a cracked tile. Addressing these issues shows your landlord you’ve cared for the property and helps ensure a smooth final walkthrough. It’s about leaving the place in the same condition you found it, minus the normal, expected wear. A little effort here can make a huge difference to your wallet and your rental history.
You don’t need to be a home improvement expert to handle minor repairs. Simple fixes like spackling nail holes, replacing a burnt-out lightbulb, or tightening a loose cabinet handle are well within reach for most renters. Taking care of these small tasks yourself can save you from potential deductions. For instance, a tiny hole from a picture frame is an easy patch job, and touching up small paint scuffs can make a wall look brand new. Focus on these quick wins to get your apartment in top shape. A quick search can give you simple DIY repair tutorials for common rental issues.
It’s important to be honest about your handyman skills. If you’re looking at a more complex issue like a significant leak, a broken appliance, or electrical problems, it’s best to leave it to the professionals. A botched repair can end up costing you more than the original problem, as your landlord may have to hire someone to fix your fix. Your lease agreement should outline the process for reporting maintenance issues. Always notify your landlord or property manager in writing about any major repairs needed. This protects you and ensures the job is done correctly without risking your security deposit.
Your smartphone is your best friend during the move-out process. Just as you (hopefully) did when you moved in, take detailed photos and videos of every room after you’ve cleaned and made repairs. Capture wide shots and close-ups of walls, floors, appliances, and any previously damaged areas that you’ve now fixed. This creates a clear visual record of the property's condition when you left. This photo evidence is your proof if any disputes about damages or security deposit deductions arise later. Make sure your photos are timestamped and save them to a cloud service for easy access.
The final walkthrough is your last official act as a tenant, and it’s a big deal. This is your opportunity to walk through the property with your landlord, review its condition together, and hopefully, part on good terms with your full security deposit on its way back to you. Think of it as the final exam for your tenancy. All the cleaning, packing, and repairing you’ve done leads to this moment. Being prepared can make the difference between a smooth, positive experience and a stressful dispute over damages.
Attending the walkthrough in person is always the best approach. It allows you to address any of your landlord’s concerns on the spot and point out how well you’ve cared for the home. This isn’t about being confrontational; it’s about having an open, transparent conversation to ensure you’re both on the same page. A successful walkthrough solidifies your reputation as a great renter, which is something you can carry with you to your next home. It’s the perfect way to close one chapter and start the next one on the right foot, with your finances and rental history intact. Your landlord will appreciate your professionalism, and you’ll have peace of mind knowing you did everything right.
Don’t leave the final inspection to the last minute. A few business days before your move-out date, reach out to your landlord to schedule a time for the walkthrough. This simple step shows you’re responsible and gives you both plenty of time to coordinate. Aim for a time after all your belongings are moved out and you’ve completed your cleaning checklist. The property should be completely empty so you can inspect every nook and cranny without boxes or furniture in the way. Once you agree on a time, send a quick email or text to confirm. This creates a simple paper trail and prevents any miscommunication about the appointment.
Walking into your final inspection prepared is key. The most important item to have on hand is your original move-in checklist, along with the photos and videos you took when you first moved in. This is your evidence. It allows you to compare the property’s current state to its initial condition, making it easy to distinguish between pre-existing issues and any new damages. You should also take a new set of photos and videos during the walkthrough to document the final condition of the apartment. It’s also smart to bring a small kit with basic cleaning supplies for any last-second smudges or spots your landlord might notice.
Your goal during the walkthrough is to have a productive and professional conversation. Being present allows you to discuss any potential issues in real time, rather than trying to sort things out over email later. As you walk through the unit, use your move-in checklist as a guide. If your landlord points out something they consider damage, you can refer to your move-in photos to clarify if it was already there. If a disagreement comes up, stay calm and focus on the facts. Clear communication helps prevent misunderstandings and is legally required if your landlord plans to make any deductions from your security deposit.
Moving is hectic, and it’s easy to let things slip through the cracks. Unfortunately, small oversights can turn into big deductions from your security deposit. By knowing the most common pitfalls, you can sidestep them entirely and ensure a smooth, conflict-free move-out.
It’s tempting to focus on the big cleaning tasks and forget the little things, like wiping down baseboards or cleaning inside the oven. These small details add up. Landlords often use a detailed checklist during the final inspection, and they will notice. Using your own move-out checklist helps you stay on track and provides a clear record of the property’s condition. This is crucial for distinguishing between normal wear and tear, which is expected, and actual damage, which can be deducted from your deposit.
Your lease agreement is your most important document. It outlines everything your landlord expects from you when you move out. Before you pack a single box, pull out your lease and read the move-out clause carefully. It will specify how much notice you need to give, the required condition for leaving the unit (like "broom-clean" or professionally cleaned), and any specific procedures you need to follow. Following these rules is the first and most critical step to getting your full security deposit back. Don't rely on memory; review your lease to know exactly what’s required.
Never underestimate the power of photographic proof. Taking detailed photos and videos of the property’s condition when you move in and again right before you leave is one of the smartest things you can do. This creates a clear, time-stamped record that can protect you from unfair damage claims. If a landlord tries to charge you for a scratch that was already there, your photos will be your best defense. Store these images in a dedicated album on your phone or in the cloud so you can access them easily if a dispute arises.
Always try to schedule a final walkthrough with your landlord or property manager and be present for it. This is your opportunity to address any potential issues in person and clear up misunderstandings on the spot. Contact your landlord a few days before you hand over the keys to arrange a time that works for both of you. Walking through the unit together allows you to point out your cleaning and repair efforts and get immediate feedback. It’s the best way to prevent surprise deductions and leave on good terms, which is something landlords appreciate.
This is the main goal, right? All that cleaning and packing is worth it when you get that full deposit back in your bank account. Your move-out checklist is your best friend in this process. It serves as concrete proof of the condition you left the apartment in, making it much harder for a landlord to make unfair claims. Think of it as your final report card for being a great tenant.
Beyond the checklist, getting your deposit back involves knowing your rights, communicating clearly, and following up professionally. Landlords are required to follow specific rules when it comes to handling security deposits, including what they can deduct for and how quickly they must return your money. If you’ve done your part by leaving the place in great shape and documenting everything, you’re in a strong position. This final step of your move is all about closing things out on a positive note and with your money securely back in your pocket. It’s not just about being clean; it’s about being smart and prepared.
Landlords can’t just keep your deposit for any reason. They can only deduct for actual damages that go beyond normal wear and tear. So, what’s the difference? Normal wear and tear includes minor issues that happen over time, like faded paint, gently worn carpets, or small scuffs on the wall. You aren’t responsible for these. Damage, on the other hand, is caused by negligence or abuse, like a giant hole in the wall, a broken window, or deep scratches on the hardwood floor. Your move-out checklist helps clearly show the difference between the two, preventing arguments. Always check your local tenant rights laws to understand exactly what your landlord can and cannot charge you for.
If your landlord sends an itemized list with deductions you don’t agree with, don’t panic. This is where all your documentation comes into play. Compare their claims against your move-in and move-out checklists and photos. If you see an unfair charge, your first step is to write a formal letter to your landlord disputing it. In the letter, clearly state which charges you disagree with and provide your evidence (like photos showing the area was clean and undamaged when you left). This creates a paper trail and shows you’re serious. Many legal aid websites offer a demand letter template you can adapt for this purpose. Stay professional and stick to the facts.
Every state has laws that set a specific deadline for landlords to return your security deposit or provide an itemized list of deductions. This is usually between 14 and 60 days after you move out. If you haven’t received your deposit or a statement within a few weeks, it’s time to check in. A polite email or phone call is a good first step. If you still don’t hear back, you may need to send a formal demand letter. Knowing the specific security deposit laws in your state is crucial, as it gives you the leverage you need to ensure your deposit is returned on time. Don’t be afraid to follow up; it’s your money, after all.
Moving doesn't have to be a chaotic scramble. With a little help from technology and some old-school organization, you can streamline the entire process. Think of these tools as your personal moving-day assistants, designed to keep you on track, reduce stress, and help you leave your old place in fantastic shape. From digital apps to professional services, adding a few of these to your strategy can make a world of difference and help you focus on the excitement of your new home.
Sometimes, the simple act of physically checking a box is incredibly satisfying. A printable move-out checklist is a powerful tool that outlines every task you need to complete before handing over the keys. Its main purpose is to help you understand exactly what needs to be done to get your full security deposit back. By having a clear list of cleaning duties, minor repairs, and administrative tasks, you can work through your to-do list methodically. This simple piece of paper can prevent major headaches and disagreements with your landlord down the line.
If you prefer to keep things digital, task management apps can be a lifesaver. Tools like Trello, Asana, or even the reminders app on your phone can turn your move-out checklist into an interactive plan. You can set deadlines for each task, assign duties to roommates or family members, and get notifications so nothing falls through the cracks. This is especially helpful for coordinating with others and keeping a detailed record of your progress. A digital checklist helps clarify the difference between normal wear and tear and any damage that needs addressing, ensuring everyone is on the same page.
Let’s be honest: after packing up your entire life, the last thing you might want to do is a deep clean. Hiring professional cleaners can be a worthwhile investment. A professional crew knows exactly what landlords look for during a final inspection, from scrubbing baseboards to cleaning inside the oven. As one moving expert notes, cleaning your home when you move out helps you get your security deposit back and avoid extra fees from landlords. While it’s an added cost, it saves you time and energy, and it can be the key to making a great final impression.
Your smartphone is one of the most important tools you have during a move. Before you move a single box out, do a thorough walkthrough and take photos and videos of every room, closet, and appliance. Documenting the property's condition is your best evidence if any disputes about damages arise. Be sure to capture the state of things when you leave, creating a clear "after" picture that complements your move-in photos. This visual proof is invaluable for protecting your security deposit and ensuring a smooth, transparent rental experience.
How do I know the difference between "normal wear and tear" and actual damage? Think of normal wear and tear as the gentle, expected aging of a home from everyday living. This includes things like paint that has faded slightly, carpets that are lightly worn in high-traffic areas, or minor scuffs on the walls. Damage, on the other hand, is the result of accidents, neglect, or abuse. Examples include a large hole in the wall, a broken window, or deep scratches in a wood floor. You are not responsible for wear and tear, but you can be charged for fixing actual damage.
What should I do if my landlord won't schedule a final walkthrough with me? If your landlord is unavailable or unwilling to do a walkthrough, you should still protect yourself by conducting your own. After the apartment is completely empty and clean, do a final walkthrough and take extensive, detailed photos and videos of every room. Be sure to capture the condition of walls, floors, and appliances. When you return your keys, send a polite email to your landlord confirming that you have vacated and attach a few of your photos, creating a time-stamped record of the property's condition upon your departure.
My lease just says to leave the apartment "broom-clean." How clean does it really need to be? "Broom-clean" is a common but somewhat vague term. At a minimum, it means you need to sweep the floors, remove all your belongings, and take out all the trash. However, because the term can be interpreted differently, it's always in your best interest to go a step further. A thorough cleaning, especially in the kitchen and bathrooms, leaves no room for dispute. Leaving the property in great condition is your best strategy for getting your full security deposit back without any arguments.
When is the best time to start my move-out process? A good rule of thumb is to start planning about eight weeks before your move-out date. This is the perfect time to review your lease agreement and give your landlord official written notice. You can begin decluttering and packing non-essential items about four to six weeks out. Spreading the tasks over two months transforms a massive project into a series of small, manageable steps and helps you avoid that stressful last-minute rush.
What's the most important thing I can do to make sure I get my security deposit back? Without a doubt, the most critical step is documentation. Take detailed photos and videos of the property's condition when you first move in and again right before you move out. This creates a clear visual record that can protect you from unfair claims. If a dispute arises over a pre-existing issue or the condition you left the apartment in, your photo evidence will be your most powerful tool to support your case and secure your full refund.